Brief
With the continuous development of single chip microcomputer, the counting equipment tends to be automatic. It needs automatic technical device with real-time, high efficiency and accuracy to meet the counting requirements of modern production line. Through the design of esp32 MCU as the core processor to meet the above requirements, in addition to the application of infrared sensor and smoke alarm function, it has the characteristics of small size, strong function, high reliability and high cost performance.
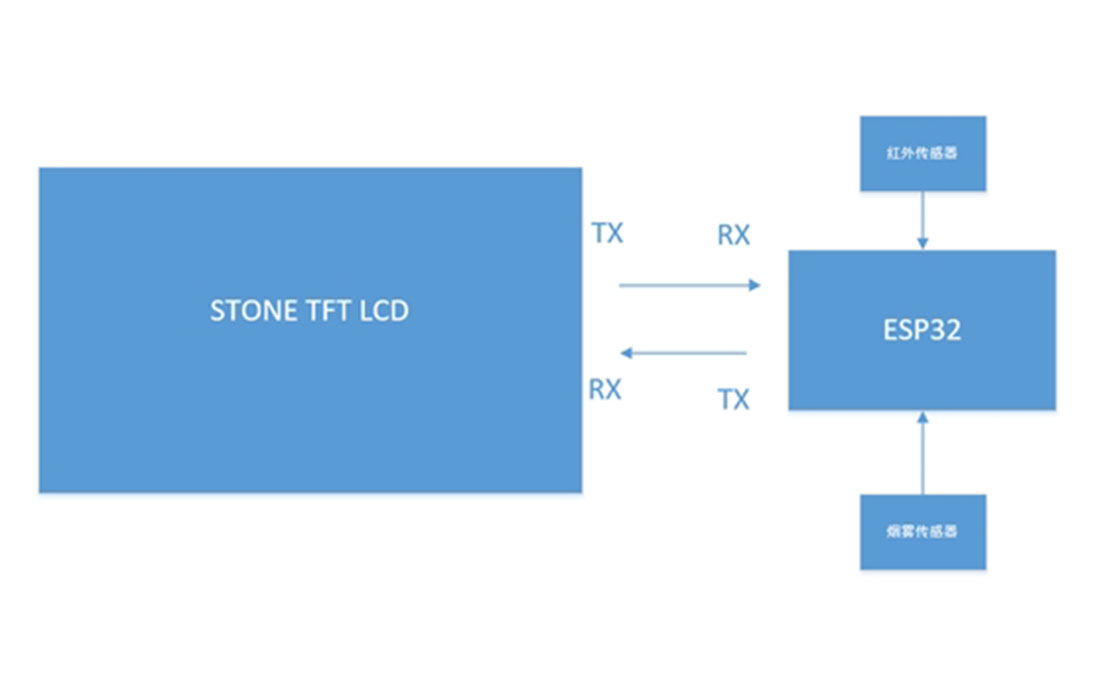
The design idea of this application is that the infrared transmitting tube emits infrared ray, and the infrared receiving tube receives the infrared ray. When the infrared receiving tube is irradiated by infrared ray, the resistance will change, and the single chip microcomputer can collect this change; so is the smoke sensor. When the smoke concentration in the surrounding environment fluctuates, it will produce a level change, and the single chip microcomputer can also collect it, The system uses STONE TFT LCD serial port screen, which is very convenient to develop. It only needs to complete the communication through the serial port. The MCU naturally adopts esp32.This application can help the production line to realize the automatic piece counting function, and has the function of fire recording. When there is a fire, the number of occurrence is recorded, and this function can expand the alarm function.
Project Overview
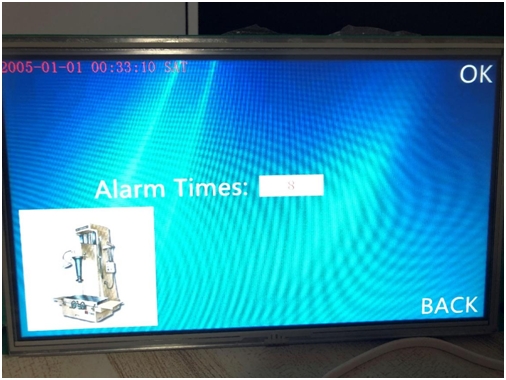
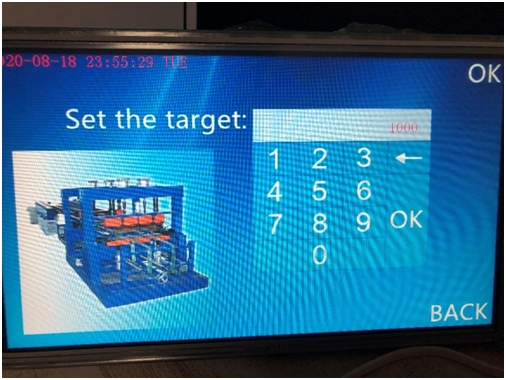
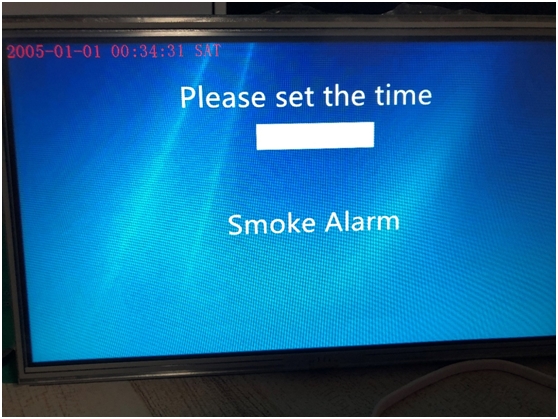
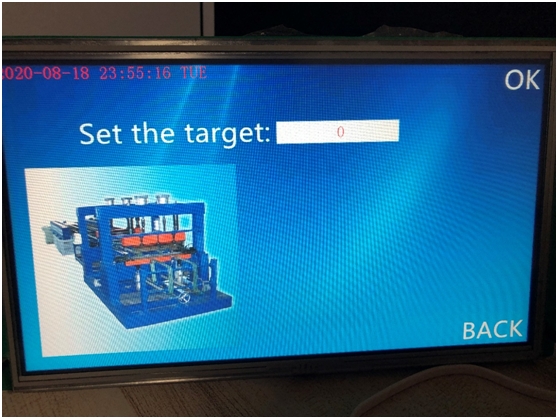
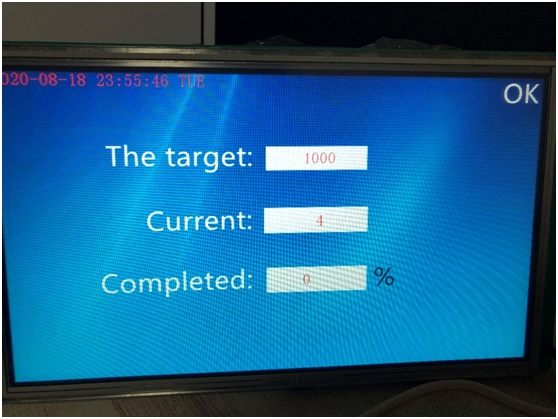
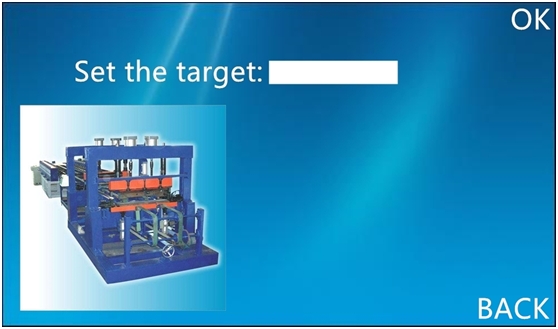
Here we do the production line counting application, after boot, STONE TFT The LCD serial port screen will have a start interface. After a short stay, it will jump to the specified page 1 and display the time setting. At this time, it is necessary to set the current time. Another option is to have a record of the number of fires, which will be added one each time, which can be used as the basis for fire control on the production line. After the time setting is completed, it will be displayed on the next interface, and click OK Enter the set production target as the assessment basis. After setting, click OK to enter the counting interface. Here, the data uploaded to esp32 through the sensor, and then transmitted to the STONE TFT LCD serial port screen through esp32. One will be added each time. The current output rate will be calculated according to the target quantity, and the data will be updated every time an object is detected.
The communication functions are as follows:
① The serial port screen of STONE TFT LCD realizes the function of button switching interface;
② The serial port screen of STONE TFT LCD realizes the function of automatic jump when starting up;
③ The serial port screen of STONE TFT LCD realizes time setting;
④ The serial port screen of STONE TFT LCD realizes data variable distribution;
⑤ STONE TFT LCD serial port screen realizes serial command communication.
Modules required for the project:
① STONE TFT LCD;
② Arduino ESP32;
③ Infrared detection module; ④ Smoke detection module.
Block diagram:
Hardware introduction and principle
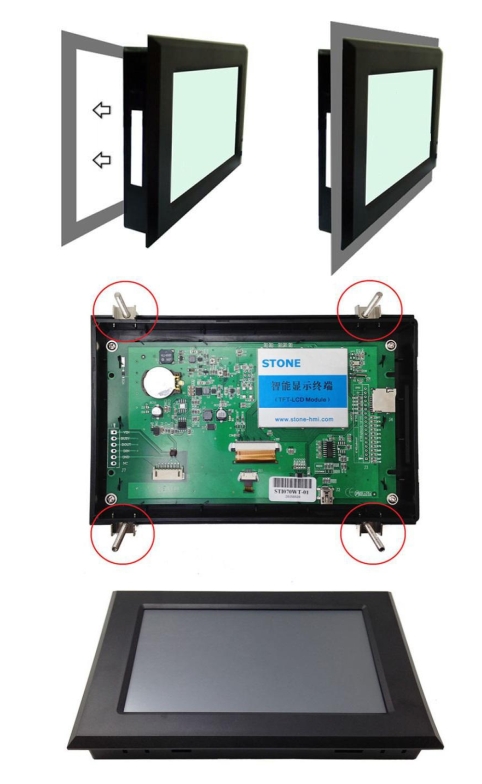
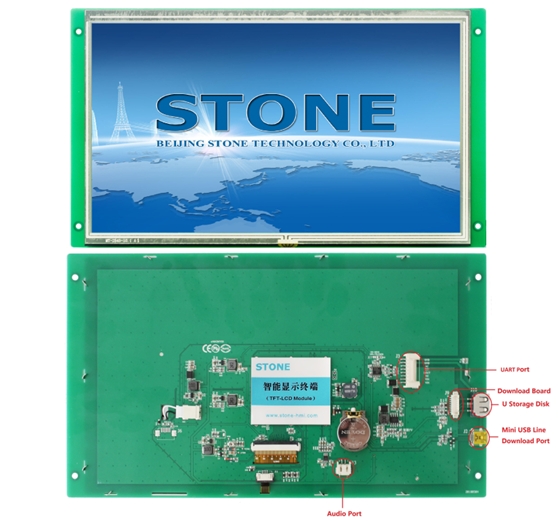
STVC101WT-01
10.1 inch 1024×600 industrial grade TFT panel and 4-wire resistance touch screen;
brightness is 300cd / m2, LED backlight;
RGB color is 65K;
visual area is 222.7mm * 125.3mm;
visual angle is 70 / 70 / 50 / 60;
working life is 20000 hours. 32-bit cortex-m4 200Hz CPU;
CPLD epm240 TFT-LCD controller;
128MB (or 1GB) flash memory;
USB port (U disk) download;
toolbox software for GUI design, simple and powerful hex instructions.
Basic functions
Touch screen control / display image / display text / display curve / read and write data / play video and audio. It is suitable for various industries.
UART interface is RS232 / RS485 / TTL;
voltage is 6v-35v;
power consumption is 3.0w;
working temperature is – 20 ℃ / + 70 ℃;
air humidity is 60 ℃ 90%.
STVC101WT-01 module communicates with MCU through serial port, which needs to be used in this project. We only need to add the designed UI picture through the upper computer through the menu bar options to buttons, text boxes, background pictures, and page logic, then generate the configuration file, and finally download it to the display screen to run.
The manual can be downloaded through the official website:
https://www.stoneitech.com/support/download
In addition to the data manual, there are user manuals, common development tools, drivers, some simple routine demos, video tutorials, and some for testing projects.
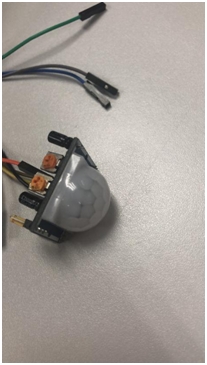
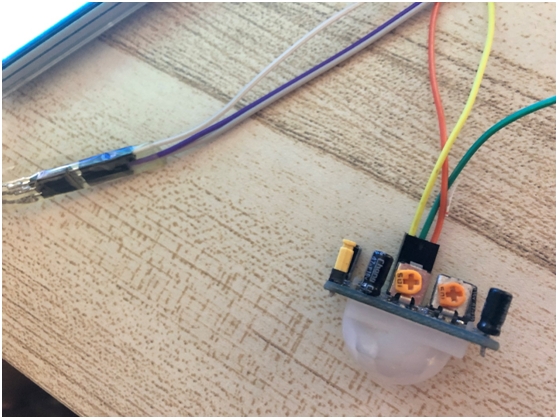
HC-SR501 Module
Product features
It is an automatic control module based on infrared technology. It is designed with lhi778 probe imported from Germany. It has high sensitivity, strong reliability and ultra-low voltage working mode. It is widely used in all kinds of automatic induction electrical equipment, especially the automatic control products powered by dry battery. A high level is output when an object is detected passing by.
Electrical parameters
| Model Number | HC–SR501 induction module |
| Operating voltage range | DC voltage 4.5-20V |
| quiescent current | <50uA |
| Level output | High 3.3 V / Low 0V |
| trigger method | L Non-repeatable trigger / H Repeat trigger |
| Board Outline Dimensions | 32mm*24mm |
| sensory angle | <100 degrees cone angle |
| working temperature | -15-+70 degrees |
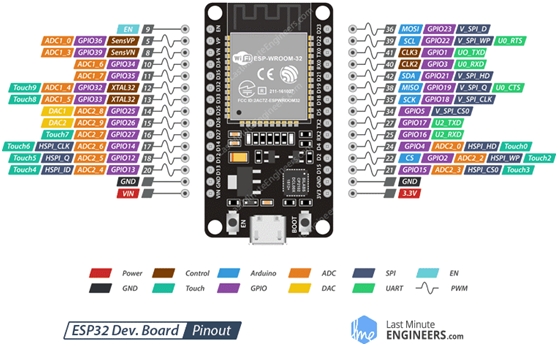
ESP32 EVB
Esp32 is a single-chip scheme integrated with 2.4 GHz Wi Fi and Bluetooth dual-mode. It adopts TSMC’s ultra-low power consumption 40 nm technology, with ultra-high RF performance, stability, versatility and reliability, as well as ultra-low power consumption, which meets different power consumption requirements and is suitable for various application scenarios. At present, the product models of esp32 series include esp32-d0wd-v3, esp32-d0wdq6-v3, esp32-d0wd, esp32-d0wdq6, esp32-d2wd, esp32-s0wd and esp32-u4wdh. Esp32-d0wd-v3, esp32-d0wdq6-v3 and esp32-u4wdh are chip models based on Eco v3.
Wi-Fi
• 802.11 b/g/n
• 802.11 n (2.4 GHz) up to 150 Mbps
• wireless multimedia (WMM)
• frame aggregation (TX / RX A-MPDU, Rx A-MSDU)
• immediate block ACK
• defragmentation
• beacon automatic monitoring (hardware TSF)
• 4x virtual Wi Fi interface
Bluetooth
• Bluetooth v4.2 complete standard, including traditional Bluetooth (BR / EDR) and low power Bluetooth (ble)
• supports standard class-1, class-2 and class-3 without external power amplifier
• enhanced power control
Output power up to +12 dBm
• nzif receiver has – 94 DBM ble reception sensitivity
• adaptive frequency hopping (AFH)
• standard HCI based on SDIO / SPI / UART interface
• high speed UART HCI up to 4 Mbps
Support for Bluetooth 4.2 br / EDR and ble dual-mode controller
• synchronous connection oriented / extended synchronous connection oriented (SCO / ESCO)
• CVSD and SBC audio codec algorithms
• piconet and scatternet
• multi device connection with traditional Bluetooth and low power Bluetooth
• support simultaneous broadcast and scanning
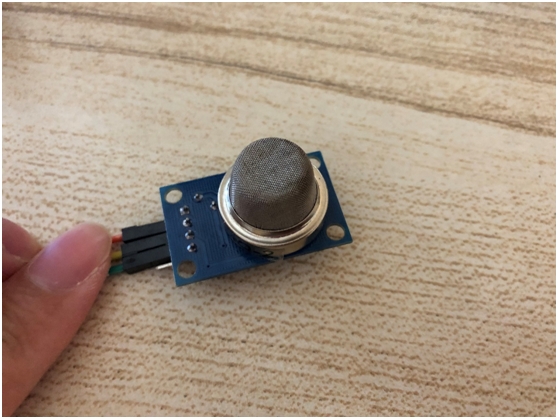
MQ-2 Alarm
Product features
Wide detection range;
High sensitivity / fast response recovery;
Excellent stability / long life;
Simple driving circuit.
Structure and Application
The sensing element, which is composed of micro Al2O3 ceramic tube, SnO2 sensitive layer, measuring electrode and heater, is fixed in the cavity made of plastic or stainless steel. The heater provides necessary working conditions for the gas sensor. When a concentration change is detected, a low level is output.
Development steps
Arduino ESP32
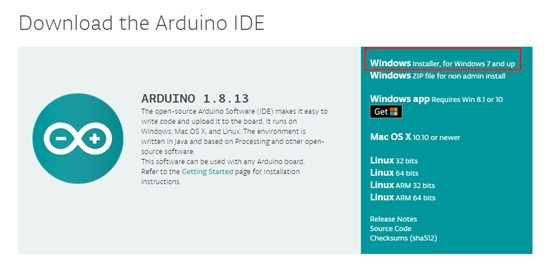
Download IDE
To complete the code development of esp32, Arduino is used to develop and compile. First, you need to install the environment and enter the Arduino official website:https://www.arduino.cc/en/Main/Software, and download the version for your own platform.
Install Arduino
Double click automatic installation. It should be noted here that Arduino ide relies on Java development environment and requires PC to install Java JDK and configure variables. If double-click fails to start, it may be that the PC does not have JDK support.
Code
“ReceivedTemp” is mainly used to receive commands from the serial port screen of STONE TFT LCD
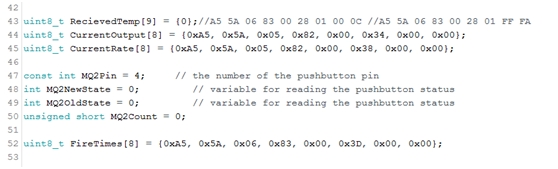
“CurrentOutput” is used to output the current output to the STONE TFT LCD
“CurrentRate” is used to output the current production rate to the STONE TFT LCD
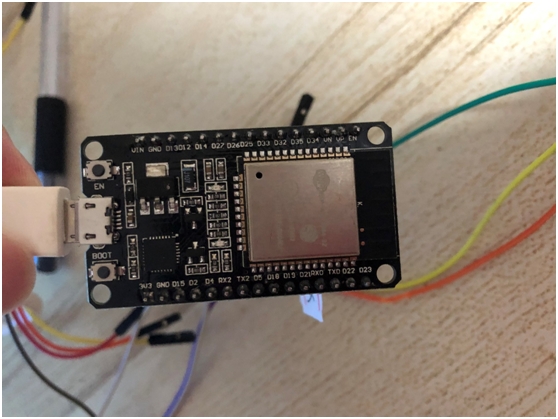
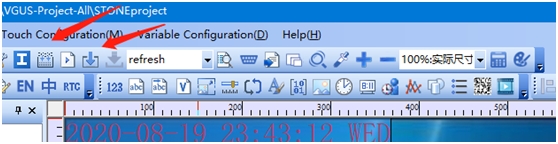
“FireTimes” is used to output the total fire records to the STONE TFT LCD Then compile, download the code to the esp32 EVB board, and click the button as shown in the figure below.

TOOL 2019
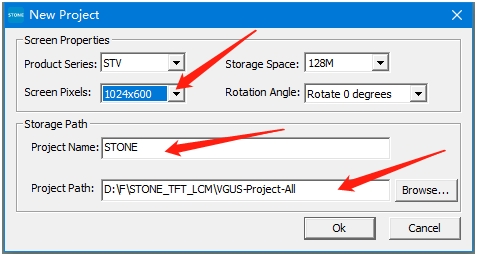
New Project
After installing tool 2019, click new project and change the resolution, project name and save path.
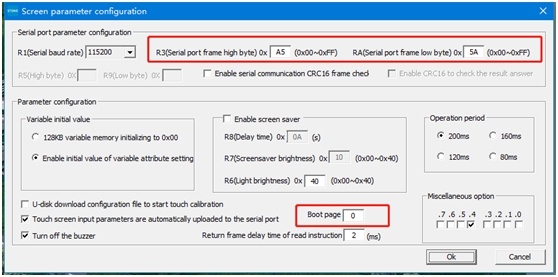
First of all, make some configuration for the screen settings, such as setting the header, starting interface, etc., as follows:
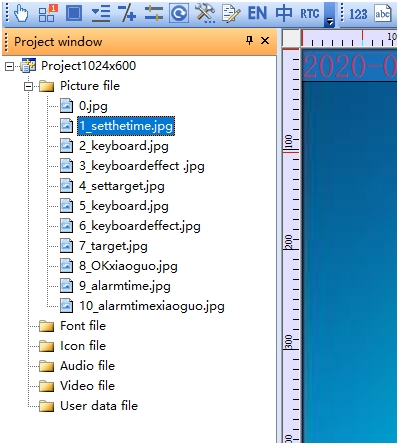
Add picture
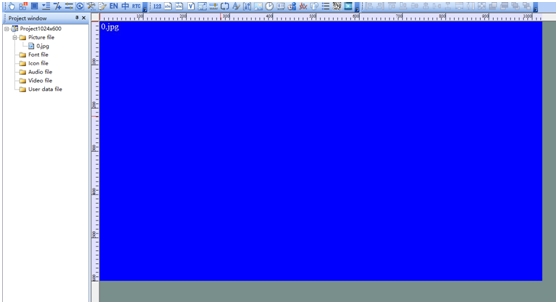
The initial state will be a blue screen. Select it, right-click to remove, and then right-click add in the same way to add the interface you need. Here I have added a total of 10 interfaces:
Setting of selection interface
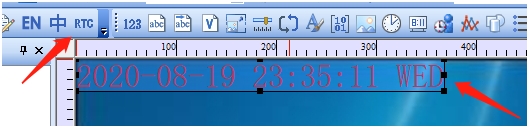
First, find the RTC control and add a time display.
Because you want to enter the keyboard, you need to do a text input control here, and configure the pop-up keyboard.
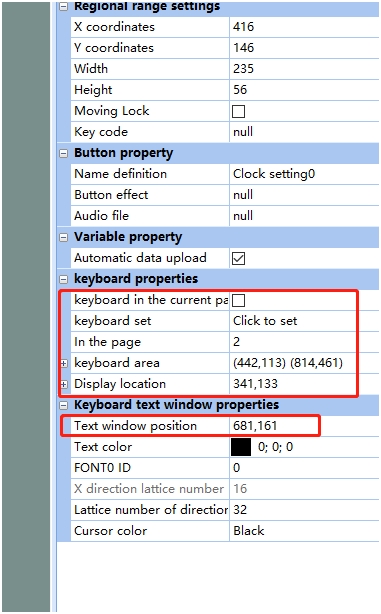
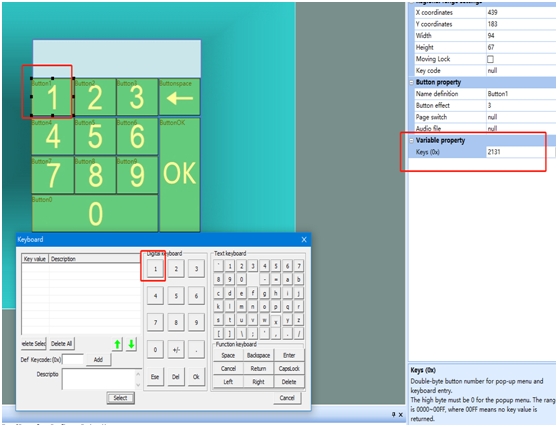
When making a keyboard, we can select the corresponding key value for the given button.
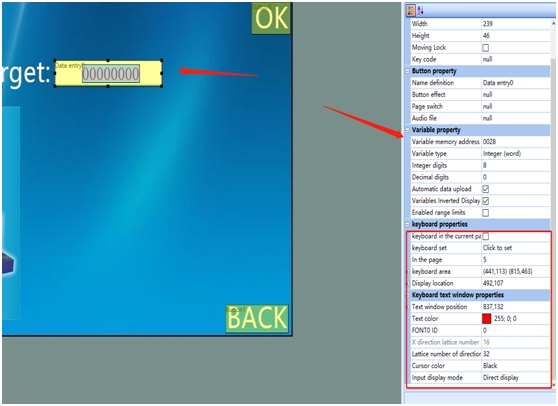
Setting the production target also requires input, and the following processing is done. The variable address here will be used when esp32 communicates with LCD.
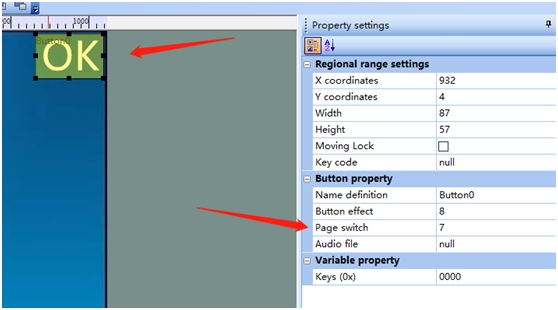
The OK key to achieve page jump function.
Here display the value reported by MCU, we distinguish the address, the other can be the same, in the alarm configuration is the same.
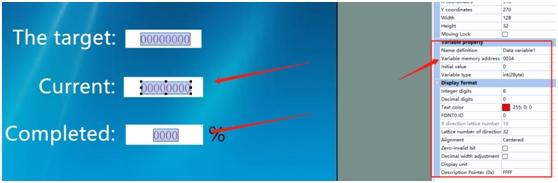
Key command setting
The Command is:
uint8_t CurrentOutput[8] = {0xA5, 0x5A, 0x05, 0x82, 0x00, 0x34, 0x00, 0x00};
uint8_t CurrentRate[8] = {0xA5, 0x5A, 0x05, 0x82, 0x00, 0x38, 0x00, 0x00};
uint8_t FireTimes[8] = {0xA5, 0x5A, 0x05, 0x82, 0x00, 0x3D, 0x00, 0x00};
This completes the setting, and then compiles, downloads, and upgrades to the U disk.
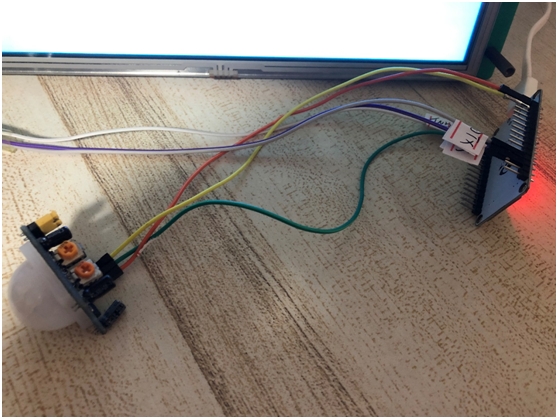
Connection
Code
/*
Button
Turns on and off a light emitting diode(LED) connected to digital pin 13,
when pressing a pushbutton attached to pin 2.
The circuit:
– LED attached from pin 13 to ground
– pushbutton attached to pin 2 from +5V
– 10K resistor attached to pin 2 from ground
– Note: on most Arduinos there is already an LED on the board
attached to pin 13.
created 2005
by DojoDave <http://www.0j0.org>
modified 30 Aug 2011
by Tom Igoe
This example code is in the public domain.
http://www.arduino.cc/en/Tutorial/Button
*/
//#include <HardwareSerial.h>
#include “stdlib.h”
#include <math.h>
uint8_t i = 0;
// Generally, you should use “unsigned long” for variables that hold time
// The value will quickly become too large for an int to store
unsigned long previousMillis = 0; // will store last time LED was updated
// constants won’t change:
const long interval = 200; // interval at which to blink (milliseconds)
// constants won’t change. They’re used here to set pin numbers:
const int IRPin = 13; // the number of the pushbutton pin
int IRNewState = 0; // variable for reading the pushbutton status
int IROldState = 0; // variable for reading the pushbutton status
unsigned short IRCount = 0;
unsigned short Targetvalue = 100;//Important
unsigned short CompleteRate = 0;
uint8_t RecievedTemp[9] = {0};//A5 5A 06 83 00 28 01 00 0C //A5 5A 06 83 00 28 01 FF FA
uint8_t CurrentOutput[8] = {0xA5, 0x5A, 0x05, 0x82, 0x00, 0x34, 0x00, 0x00};
uint8_t CurrentRate[8] = {0xA5, 0x5A, 0x05, 0x82, 0x00, 0x38, 0x00, 0x00};
const int MQ2Pin = 4; // the number of the pushbutton pin
int MQ2NewState = 0; // variable for reading the pushbutton status
int MQ2OldState = 0; // variable for reading the pushbutton status
unsigned short MQ2Count = 0;
uint8_t FireTimes[8] = {0xA5, 0x5A, 0x05, 0x82, 0x00, 0x3D, 0x00, 0x00};
void setup()
{
Serial.begin(115200);
// Serial.print(“Project start\r\n”);
// Serial2.begin(115200);
// Serial2.print(“Serial2.begin”);
// initialize the pushbutton pin as an input:
pinMode(IRPin, INPUT);//IR
pinMode(MQ2Pin, INPUT_PULLUP);//MQ2
//digitalWrite(IRPin,LOW);
//srand(0);
}
void loop()
{
// read the state of the pushbutton value:
// check to see if it’s time to blink the LED; that is, if the difference
// between the current time and last time you blinked the LED is bigger than
// the interval at which you want to blink the LED.
unsigned long currentMillis = millis();
if (currentMillis – previousMillis >= interval)
{
previousMillis = currentMillis;
IRNewState = digitalRead(IRPin);
if(IRNewState != IROldState)
{
//delay(50);
IROldState = IRNewState;
// check if the pushbutton is pressed. If it is, the buttonState is HIGH:
if (IRNewState == HIGH)
{
// Serial.print(“Quantity+1\r\n”);
IRCount ++;
CurrentOutput[6] = IRCount >> 8;
CurrentOutput[7] = IRCount & 0xFF;
Serial.write(CurrentOutput, 8);
delay(2);
CompleteRate = (IRCount *100) / Targetvalue;
CurrentRate[6] = CompleteRate >> 8;
CurrentRate[7] = CompleteRate & 0xFF;
Serial.write(CurrentRate, 8);
// Serial.print(“\r\n”);
}
else
{
// Serial.print(“Not increase\r\n”);
}
}
// read the state of the pushbutton value:
MQ2NewState = digitalRead(MQ2Pin);
if(MQ2NewState != MQ2OldState)
{
//delay(50);
MQ2OldState = MQ2NewState;
// check if the pushbutton is pressed. If it is, the buttonState is HIGH:
if (MQ2NewState == LOW)
{
// Serial.print(“Smoke Alarm+1\r\n”);
MQ2Count ++;
FireTimes[6] = MQ2Count >> 8;
FireTimes[7] = MQ2Count & 0xFF;
Serial.write(FireTimes, 8);
// Serial.print(“\r\n”);
}
else
{
// Serial.print(“Normal\r\n”);
}
}
}
//Serial2
if(Serial.available() != 0)
{
for(i = 0; i < 9; i ++)
{
RecievedTemp[i] = Serial.read();
}
//merge
Targetvalue = 0;
Targetvalue = Targetvalue | RecievedTemp[7];
Targetvalue = Targetvalue << 8;
Targetvalue = Targetvalue | RecievedTemp[8];
if(Targetvalue == 0)
{
Targetvalue = 100;
}
// Serial.write(&Targetvalue, 1);
// Serial.print(Targetvalue);
}
}
Appendix